This guide will help you set up a Yeastar PBX running firmware 30.0+ with SIP.US. The unit used in this guide is an S20. The guide will help you add your SIP trunk, an inbound route, and an outbound route to your Yeastar device.
1. Access your Yeastar PBX interface by typing its IP address into your browser.
2. Select the "Settings" icon, then select "Trunks".

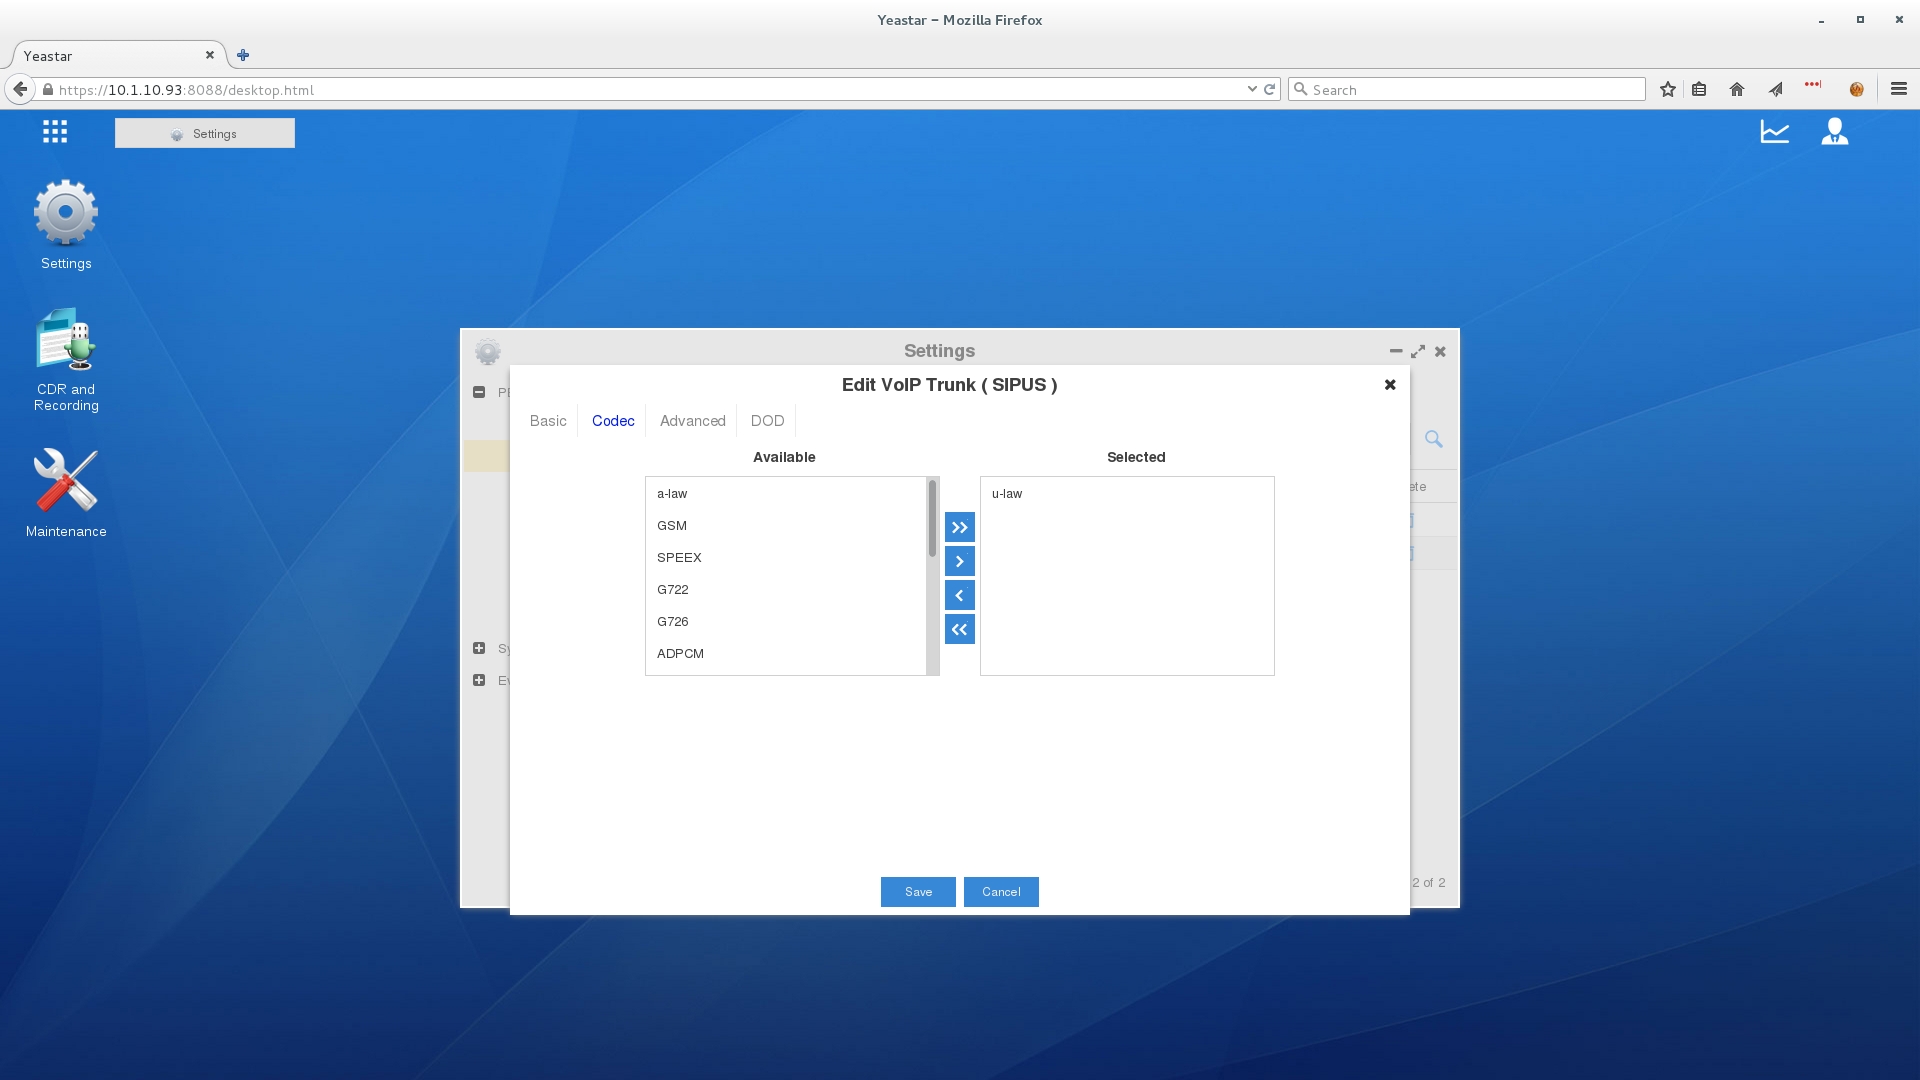
3. Create a new SIP trunk, as referenced in the image below. This will take you to the "Basic" configuration tab for the new SIP trunk.
NOTE: Your SIP trunk number is found under the "SIP Trunking" tab in the SIP.US customer portal. The SIP trunk password is revealed by clicking the "Show Password" button in the SIP trunk settings.
- Provider Name: "SIPUS"
- HostnameIP: "gw4.sip.us"
- Port: "5060"
- Domain: "gw4.sip.us"
- User Name: (Your SIP trunk number)
- From User: (Your SIP trunk number)
- Enable Outbound Proxy: (Unchecked)
- Password: (Your SIP trunk password)
- Authentication Name: (Your SIP trunk number)
4. For the "Codecs", SIP.US recommends using G.711 u-law for the best voice quality.
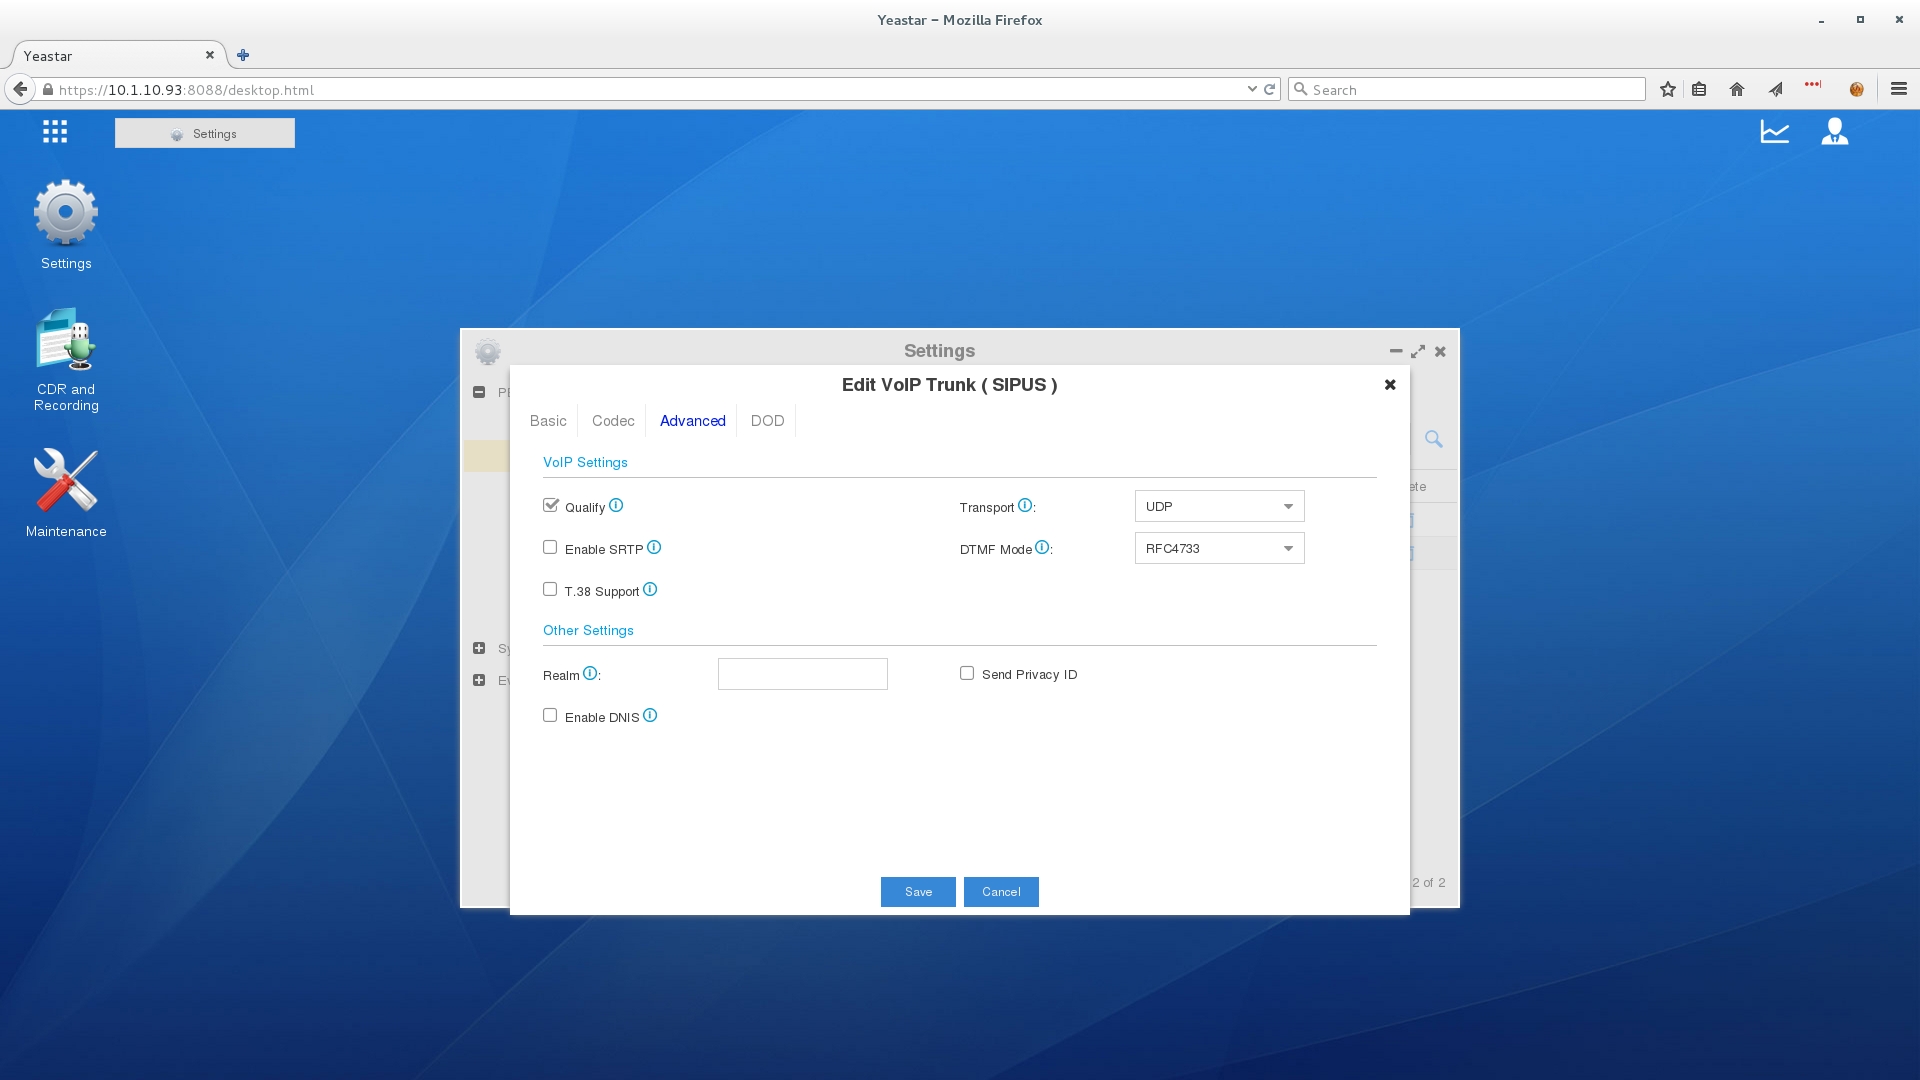
5. Select the "Advanced" tab and configure the following:
- Check "Qualify" which sends SIP options pings to the SIP.US gateway to ensure connectivity. This can also be helpful in keeping NAT translations stable.
6. You will next add an additional SIP trunk entry to ensure full redundancy. Duplicate all of the settings in the previous steps, but replace "gw4.sip.us" with "gw5.sip.us". This additional registration will provide a failover option in case there is ever an issue with reaching one of the SIP.US gateways. SIP.US will immediately switch over to delivering calls to your secondary registration, allowing you to avoid outages.
For more information on SIP.US gateways and whitelisting requirements, see this article on Interconnecting with SIP.US. You can also Check Your SIP Trunk Registration Status.
6. The next step is to configure inbound routes. Navigate back to the PBX menu and select "Call Control" and then "Inbound Routes".
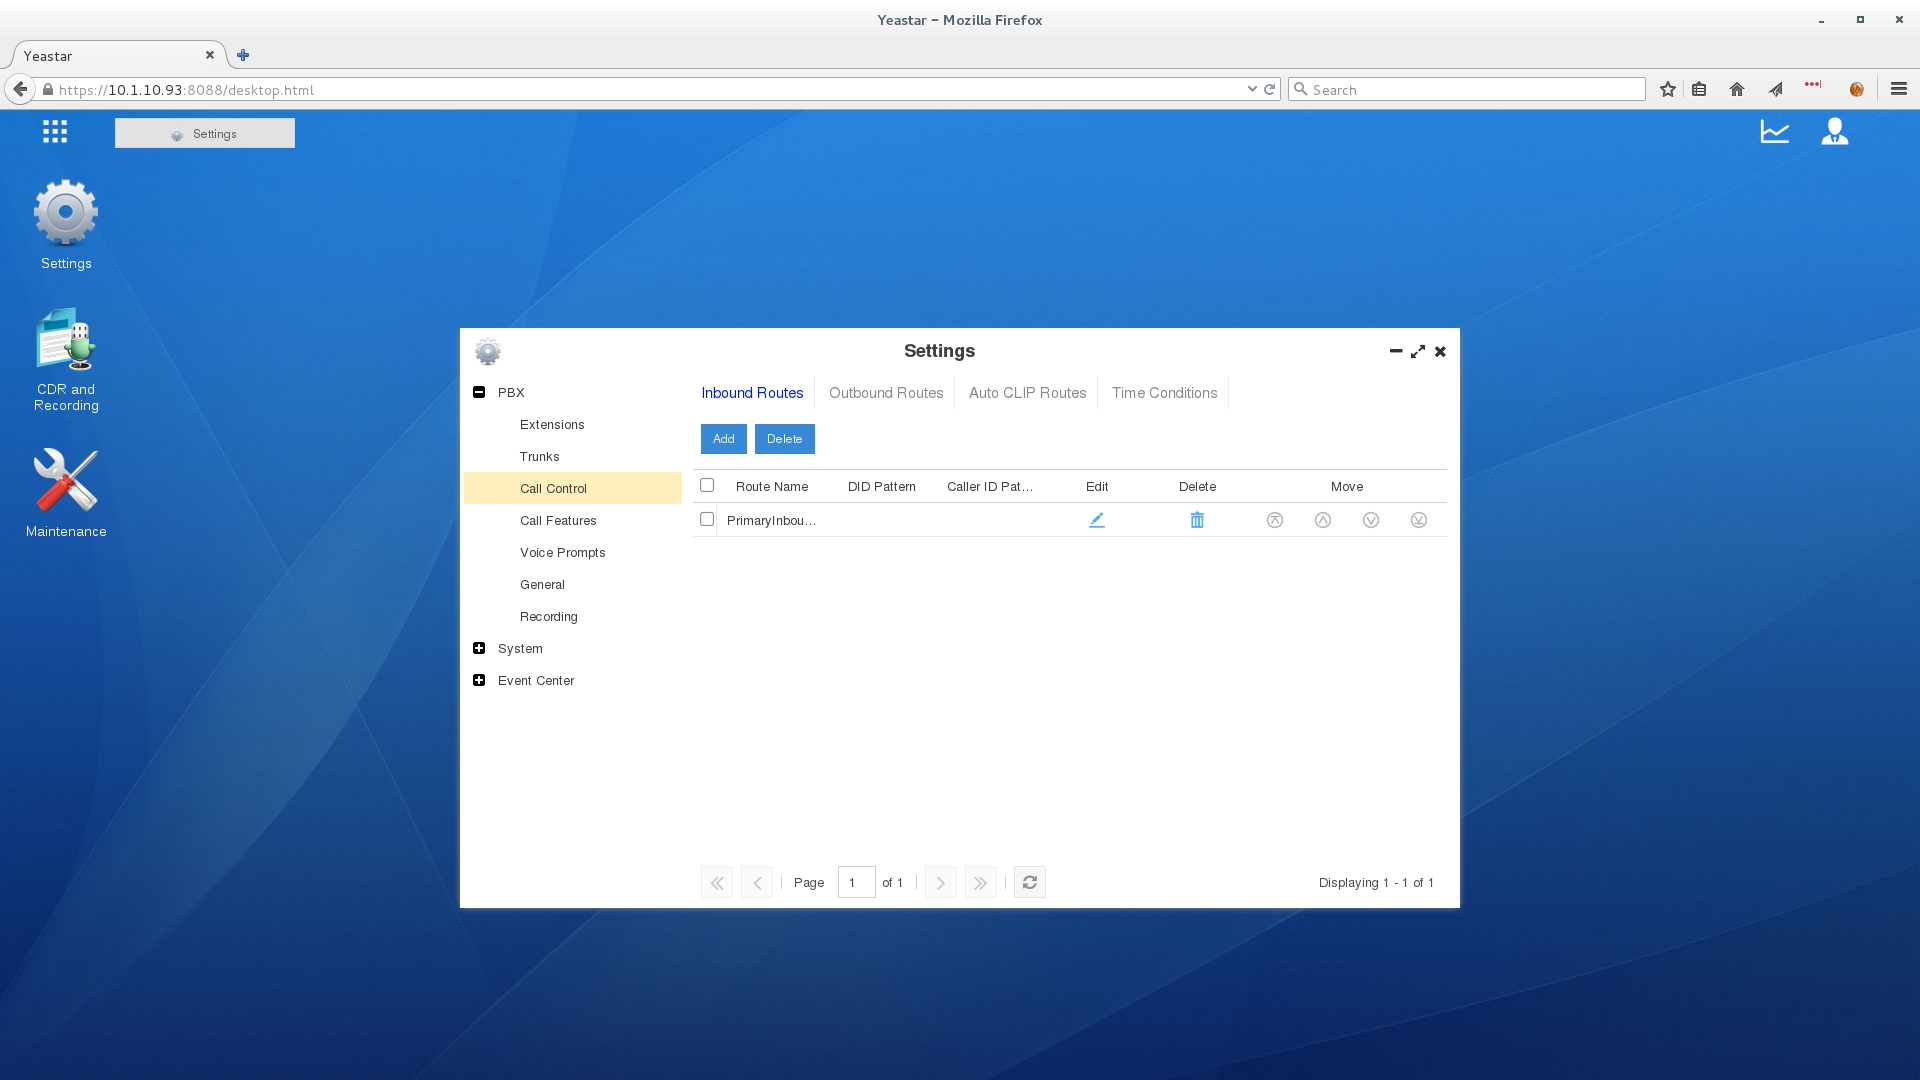
7. In this configuration, we left the DID pattern blank so as to allow any DID from SIP.US to call in to the Yeastar device. Note that you must select your SIP trunk as a member of the inbound route. We created a SIP trunk for "gw4.sip.us" and "gw5.sip.us" so that calls may reach the PBX from any gateway.
If you wish to only allow certain DIDs to access your Yeastar device, use the DID Pattern 1NXXNXXXXXX.
Example: 15557778888

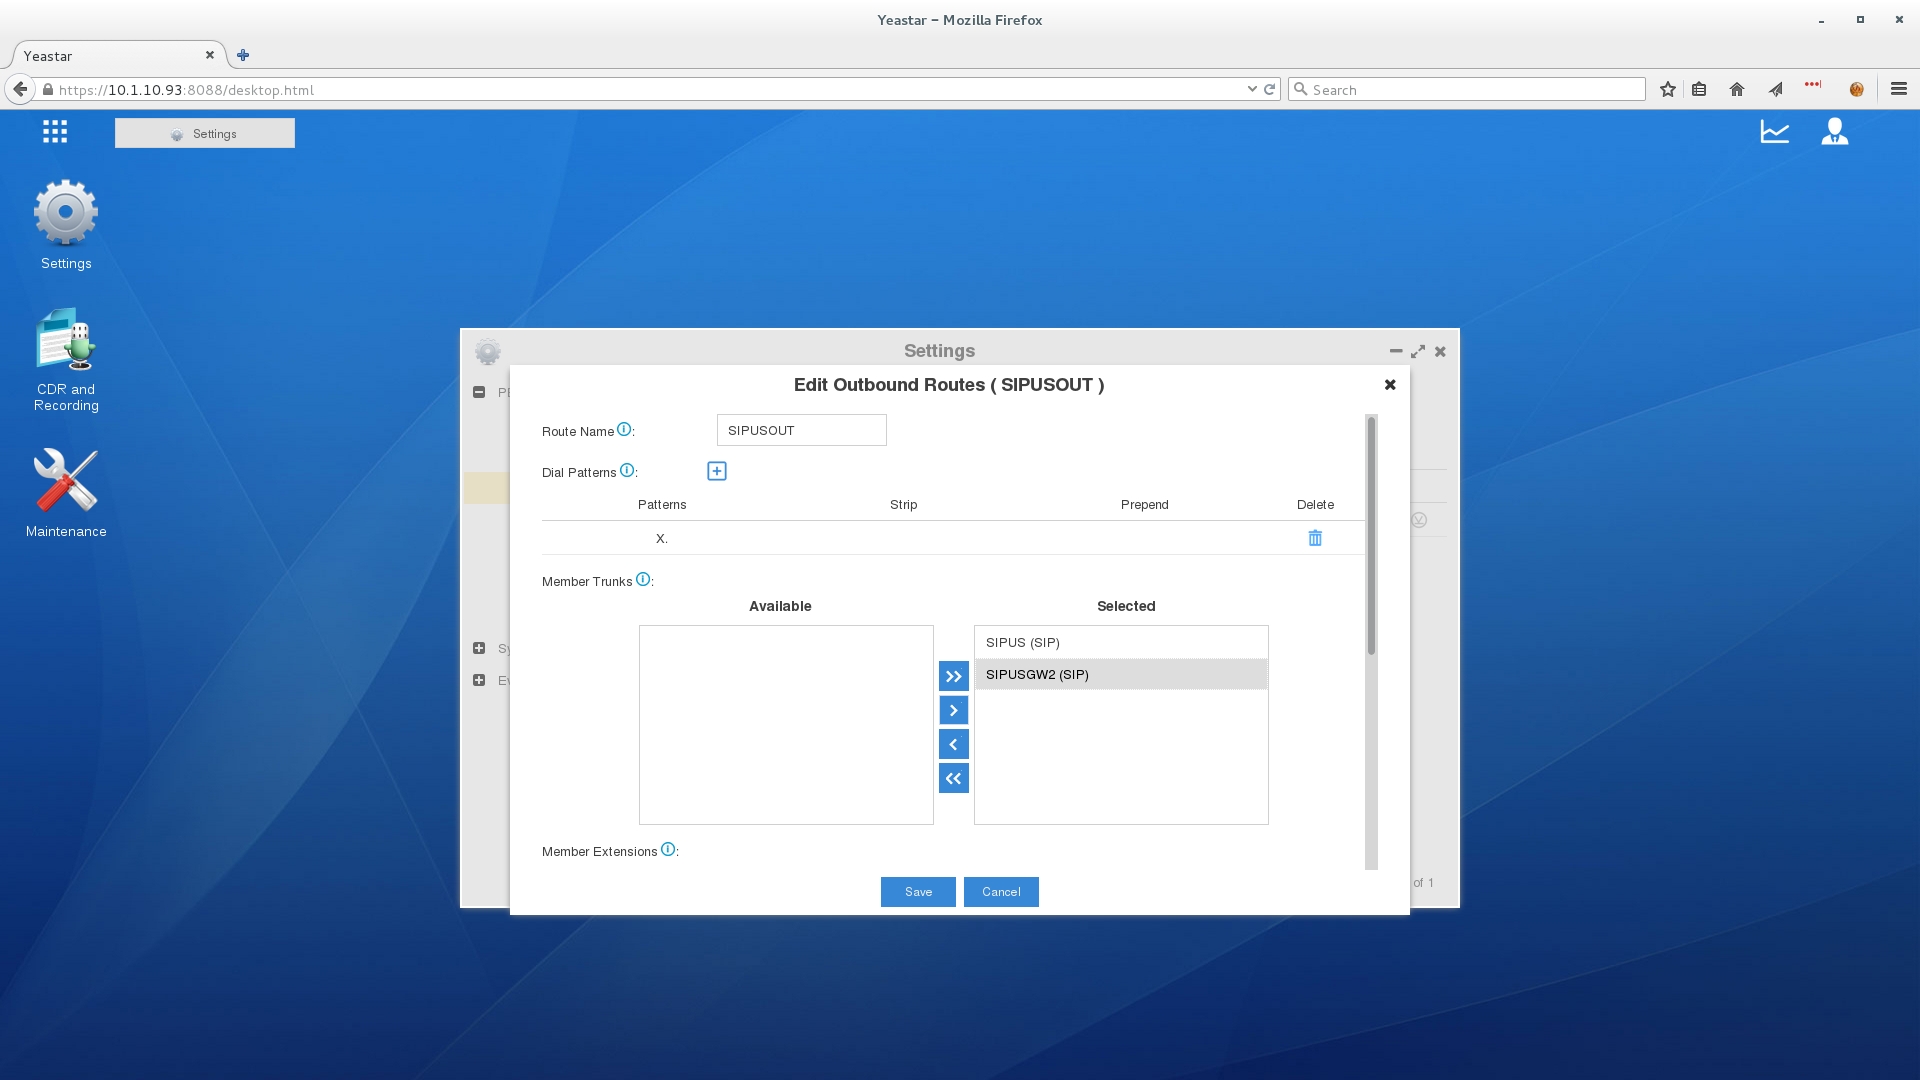
8. Next, navigate to the "Outbound Routes" tab to add an outbound route.

9. We chose to use "X." for testing which allows us to dial any number of digits. However, North American calls must send 11 digits in the dialing pattern. See this guide on "Setting Up Outbound Calling" for more information on specific dialing patterns you can use.
10. You will also need to configure a legitimate caller ID to comply with STIR/SHAKEN. Refer to this article on Setting Up Caller ID for more information.
Your Yeastar system should now be fully configured to work with SIP.US. Proceed to place some test calls and confirm the results. If your system is not working, please review these Troubleshooting Guides for help with common issues and open a support ticket with our team at support@sip.us if your issues persist.